Using PiFire
If you've finished with the installation and configuration, PiFire will be ready to use. Once the system is up and running, you should be able to access the WebUI via a browser on your smart phone, tablet or PC device.
It's recommended at least taking a peek at the PiFire overview video below. It covers the basics of operation, settings and control.
This video is for the previous version and will be updated soon.
If you setup a hostname (ex. pifire.local) when flashing your SD Card, it's likely you can simply access the WebUI by typing http://pifire.local into your browser. If that doesn't work for you, simply navigate to the IP address of your device for example (you can usually find the IP address of your device from looking at your router's configuration/status pages). My router typically assigns IPs with prefixes of 192.168.YYY.XXX. I'll use examples on my home network here, so you'll see URLs like: http://192.168.10.42 Yours may look different depending on your routers firmware/manufacturer (i.e. 10.10.0.XXX, etc.)
Note: It’s highly recommended to set a static IP for your Pi in your router’s configuration. This will vary from manufacturer to manufacturer and is not covered in this guide. A static IP ensures that you will be able to access your device reliably, without having to check your router for a new IP every so often.
The Dashboard
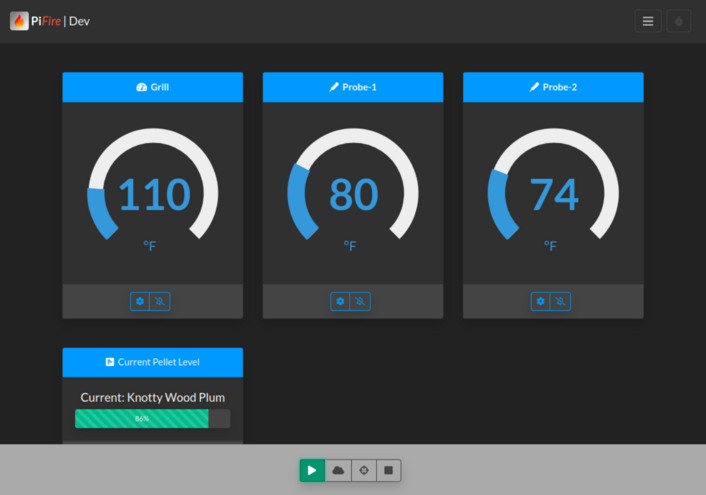
The interface / webui is broken out several pages. The first is the dashboard view where you can check the current status of the grill, and control the modes. Clicking the PiFire logo in the upper left will always take you back to the dashboard from whatever screen you are on.
Pressing the hamburger icon in the upper right of the interface, allows you to also access to the other screens.
You will not see temperatures displayed until you are in startup, operation, or monitor mode. If you have an attached display, the screen will remain black/blank until Pifire is in startup, operation or monitor mode - or if you have interacted with the input(buttons or encoder knob).
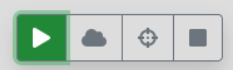
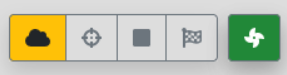
Initially you will have four controls at the bottom of the screen.
- Prime Mode (Chevron Icon) - This is a drop-down button which allows you to select an amount of pellets to prime the firepot with. You can also select whether to immediately startup the grill after priming.
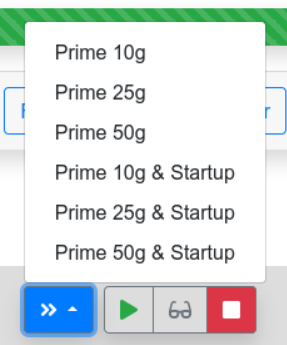
-
StartUp Mode (Play Icon) - If you select this mode, you grill begin to start up by turning on the fan, the igniter and will cycle the auger a predefined amount from the settings.json. The igniter will stay on for the entirety of startup mode which is set to four minutes by default. Once the time has elapsed, startup mode will end and it the grill should transition to smoke mode.
-
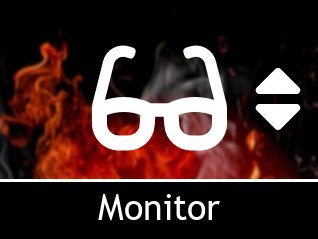
Monitor Mode (Glasses Icon) - If you have your original controller running and you want to just monitor the temperatures of the grill and use the meat probes, you can do this by selecting this mode. This way you can still set/get notifications, or monitor the temperatures of the meat or grill remotely.
-
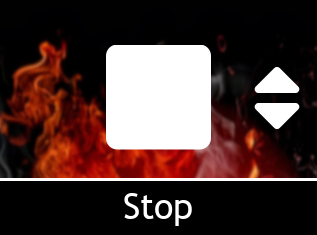
Stop Mode (Stop Icon) - The default mode when the system is turned on is stop mode. In this mode, the grill will not be sampling temperatures and will not be controlling the grill at all. Effectively, the PiFire controller is OFF and you can safely use the original controller (if connected).
After you select startup, you will see the following icons:
- StartUp Mode (Play Icon) - This will continue to be displayed for the duration of the startup cycle (four minutes by default), then should disappear after transitioning to the next mode (smoke mode by default).
- Smoke Mode - In this mode, the smoker will cycle through a predetermined cycle from your settings, that is intended to generate smoke. Just like your original controller, smoke mode isn't trying to hit a temperature target, rather it is running through a fixed cycle of turning on/off the auger to feed more pellets into the firepot.
- Hold Mode - This mode uses the selected controller (PID by default) to hold a specific temperature, by feeding the fire at intervals that are dynamically calculated at the end of each cycle. When you click on the target icon, this will bring up a dialog that you can use to select a target/setpoint temperature using the slider.
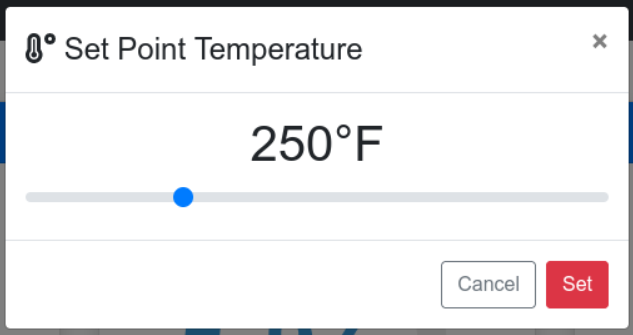
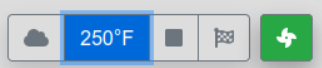
Once you've set a target temperature for the hold mode, the control panel will highlight the hold icon and will display the hold temperature.
-
Shutdown Mode (Finish Flag Icon) - This mode simply shuts off the auger and keeps the fan running for as set amount of time (60 seconds by default) to burn down some of the remaining pellets. It's a bit more graceful than just turning off the grill immediately. You can configure a longer or shorter shutdown time in the settings. Once the controller finishes the shutdown cycle, you'll see the original startup, monitor and stop buttons again.
-
Smoke Plus Mode - Green button with fan icon indicates that Smoke Plus is enabled and will cycle the fan between the temperature window specified in settings. This can be disabled by clicking on this button or enabled by clicking the same button.
-
Timer - Relatively self explanatory, but you can set a timer which will send a notification (if enabled) when it expires. This timer will be visible at the top of the dashboard while running and can be paused, stopped, started from there. The timer visibility can be toggled on any page from the title bar, next to the menu select icon.
A Note on “Safety” Features
PiFire has some basic built in safety features which are configurable in the settings section.
-
Low Temperature Shutdown - If you’re like me, you may have experienced your fire going out in the firepot which leads to the grill dumping it’s entire load of pellets into barrel. This is both a pain to clean up and something that is completely avoidable. PiFire will check the temperature before startup, after startup and during Smoke and Hold modes to ensure that the temperature never drops below the startup temperature. If it does, it will immediately stop the grill, and send a notification (if notifications are enabled). Note that this is not checked during Monitor mode.
-
High Temperature Shutdown - Now, I’ve never had this happen to me, but it might be possible to exceed safe temperature limits in your smoker grill. During, startup, smoke, hold and monitor modes, PiFire will monitor the temperature to make sure it doesn’t exceed the maximum grill temperature set in the settings.json file. If the temperature exceeds these levels, PiFire will immediately stop the grill, and send a notification (if notifications are enabled).
Example of icon that appears in error conditions:

Settings
The settings page has several card sections that can modify the settings/behavior of PiFire.
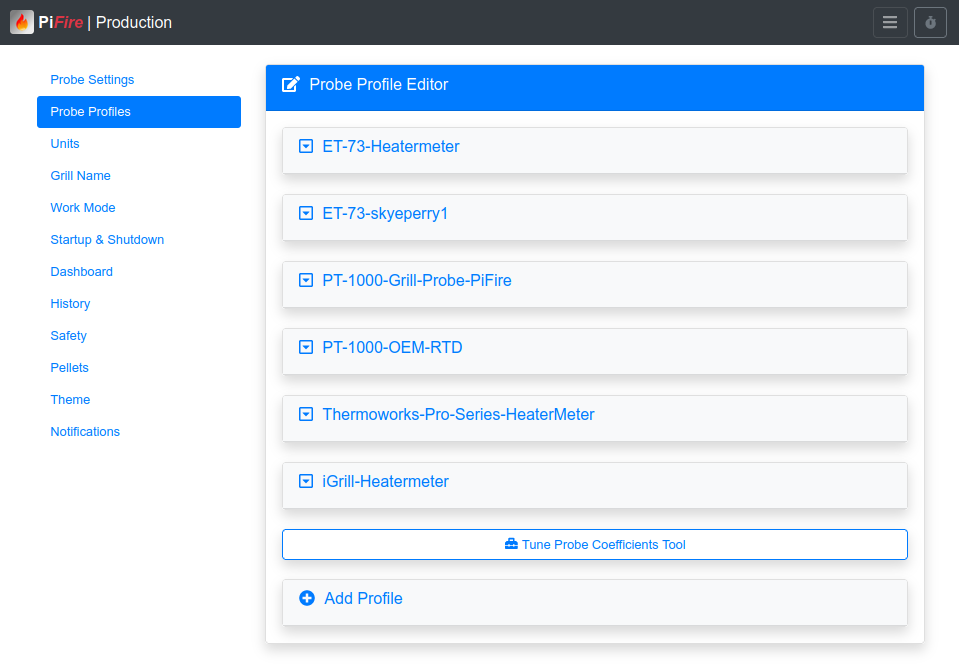
Probe Settings & Probe Profile Editor - In the Probe Settings you can select the probe profiles that you want to use for the different attached probes. By default, I've included profiles for the probes that I have on hand at home and have been able to find coefficients for from various forums (Heatermeter / Skyperry). In this card you can also change the display names of each of the probes from the existing names.
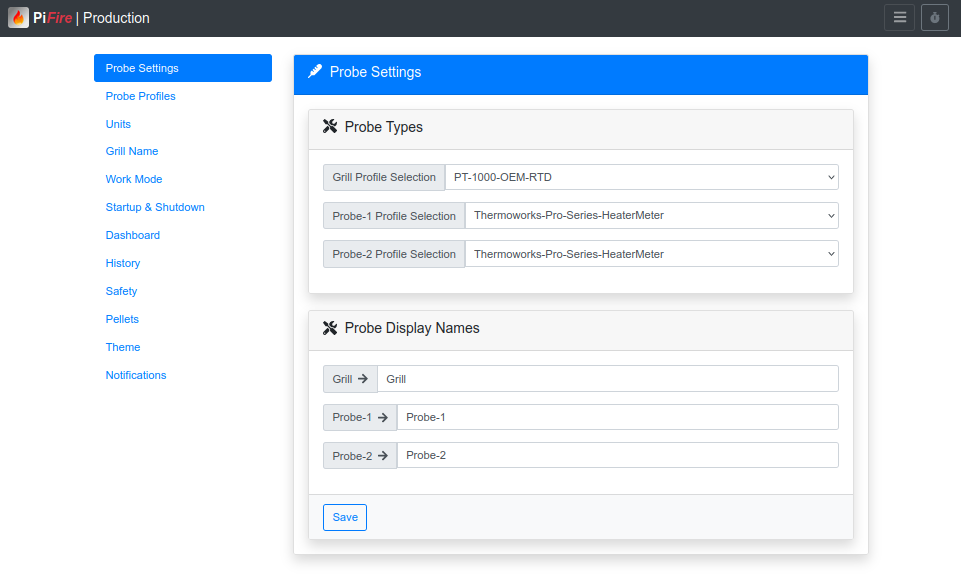
The profile editor allows you to modify the existing probe profiles or add your own new probe profile. If you get add something new or improve upon the default probe profiles, feel free to submit a pull request in the future.
When adding a new profile, these are the configurable settings:
- Name - More free-form text field for the human readable name. I've chosen to put dashes between words, but it's probably not necessary.
- Vs - This is the voltage of the source. Because we're dealing with calculating temperature, precision is important. Thus, just using 3.3V for the source voltage could throw off the resistor divider calculations, given you a different calculated resistance across the probe. This could lead to inaccurate temperature readings. It is highly recommended to use a multimeter to measure the voltage source on the 3.3V rail. For the defaults in PiFire, I've used 3.28V which is what I measure on my build.
- Rd - This is the value of your R1 resistor in Ohms in the resistor divider circuit. As mentioned in the hardware parts list, you should try to get a resistor that has good tolerance to ensure accuracy. However, if you have resistors that might slightly off, you can modify the value here. In addition, if you plan to use RTD type probes with a nominal 1k resistance paired with 1k resistors in the resistor divider, then modify this setting here. You may want to name the profile appropriately if you change this value.
- Coefficient's A,B,C - These are the coefficient values that are used in the Steinhart-Hart equation which will determine the temperature based off of the resistance of the probe determined above. This equation is regarded as the best mathematical expression for the resistance - temperature relationship of thermistors. More information about Steinhart Hart can be found in the Wikipedia article. Coefficients can be derived by measuring the resistance of your probe across the operating range of temperature points. Once you have that data, there are online calculators that can produce the coefficients for you. I used this calculator to determine coefficients for my RTD probe. Or, as mentioned before, you can lift these coefficients from other projects like HeaterMeter or this project by Skyeperry on GitHub.
Pro Tip: Lot’s of wonderfully good information can be gathered from HeaterMeter’s Probe documentation. This is all mostly relevant to this project as well, since the design is basically the same.
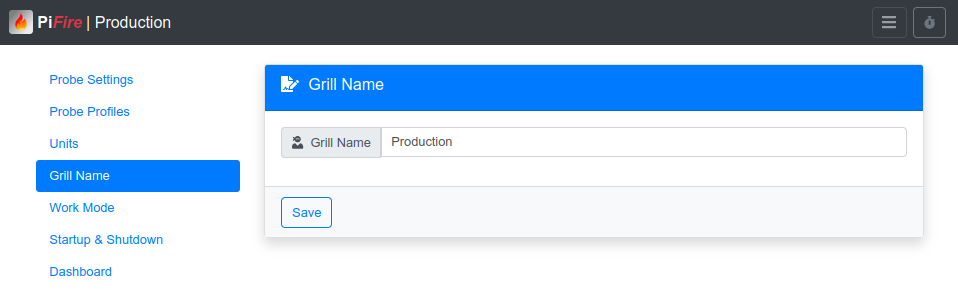
Grill Name - Optionally you can choose to add a name for your grill which will be displayed on most screens in the navbar. This is just for fun and if you have multiple grills with multiple PiFire builds (lucky you!) then you should be able to use this to tell them all apart. For me, I use this to differentiate between my real grill vs. my test systems.
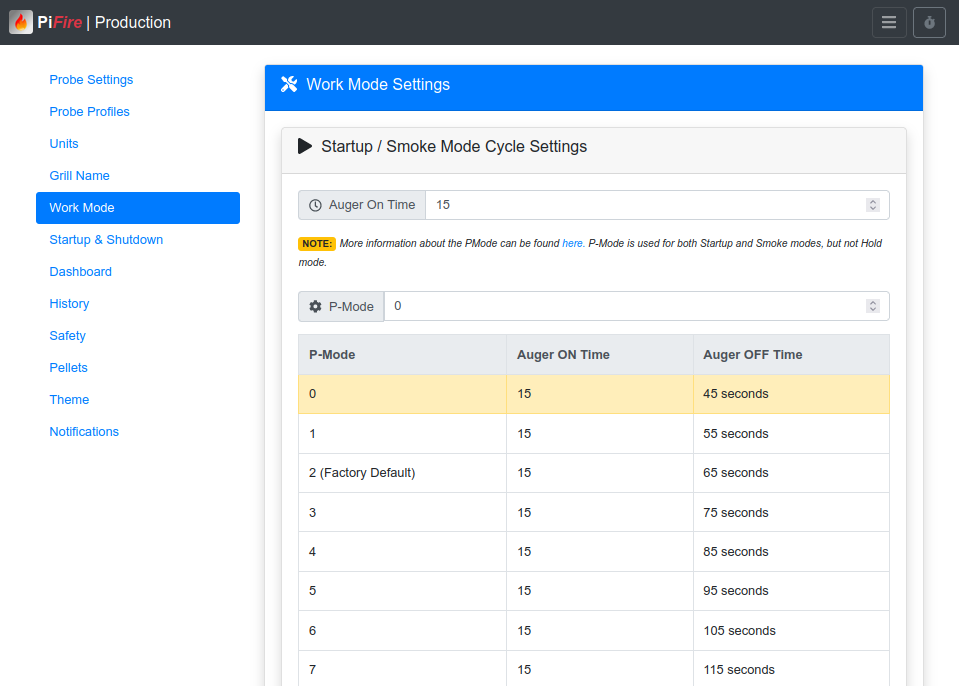
Work Mode Settings - (Startup/Smoke Cycle Settings): Startup and Smoke modes are similar in that they use a fixed auger on/off cycle time (this is not dynamically changed as in the hold mode). The Auger On Time setting is the amount of time the auger should run at the beginning of the cycle. The default is 15 seconds. PMode is a way to set the auger off time during the Startup and Smoke cycles. The default value is 2, which will run the auger on for 15 seconds and then off for 65 seconds during a single cycle. Depending on the outside temperature, you may want to decrease this value for colder environments or increase this value for warmer environments. This helps you dial in the temperature of the smoke cycle so that it is not too high or too low.
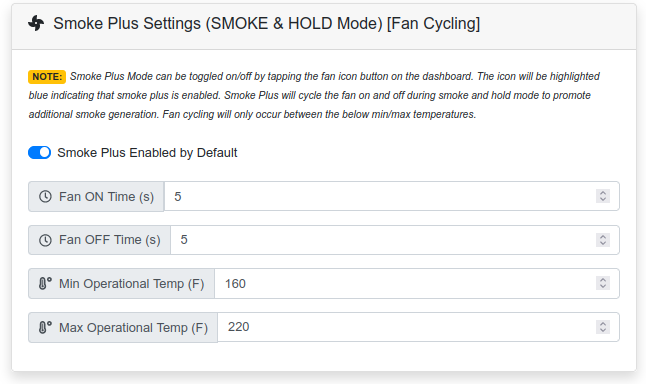
Smoke Plus Settings - Smoke Plus is a feature that theoretically can improve the smoke output of the smoker during Smoke and Hold modes. The way this works is to cycle the fan on/off which allows the pellets to smolder with the fan off and then produce more smoke when the fan is turned back on. The default setting is enabled by default, cycle time of 10 seconds (5 seconds on / 5 seconds off), between the temperatures of 160F and 220F.
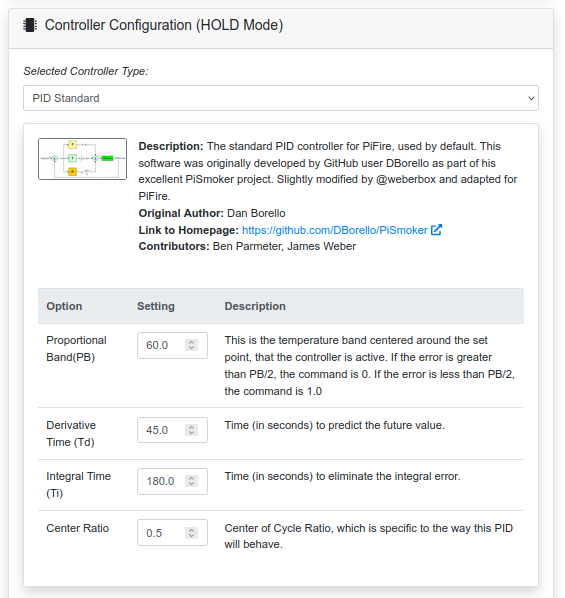
Controller/Hold Settings - As of v1.5.0, you can select which controller to use for the Hold mode. It's highly recommended to utilize the PID Standard controller, as it is well tested and will suit the needs of most users. The current PID controller which was designed by Dan Borello for the PiSmoker project. For more information about his PID controller, check out his blog. I am humbled by his work and thus utilized his controller with almost no modification in this project.
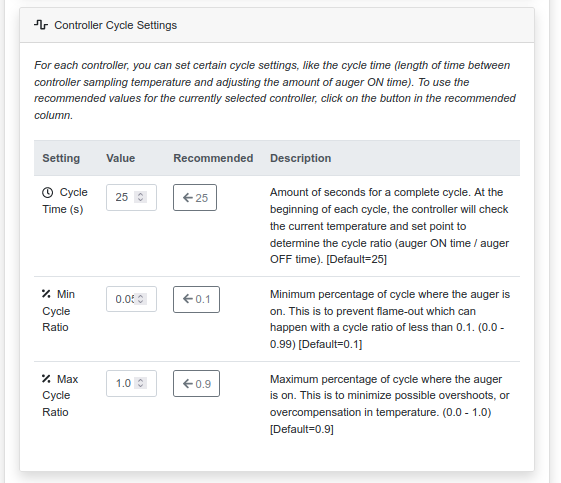
Other/Global controller cycle settings can also be configured manually. However, the recommended settings can be selected by clicking on the button in the recommended column.
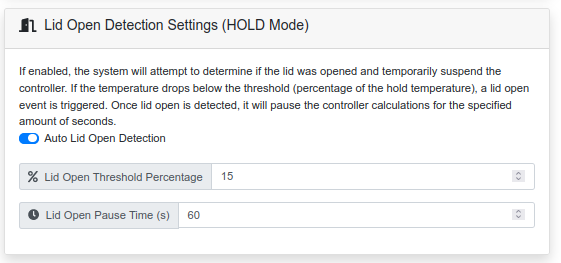
Lid Open Auto-Detection will detect if the lid was opened on the grill and will pause the PID for a certain amount of time. This is useful to prevent large overshoots when the PID dumps pellets into the firepot to compensate for a drop in temperature. You can modify these settings to change the behavior of how this auto-detection will function.
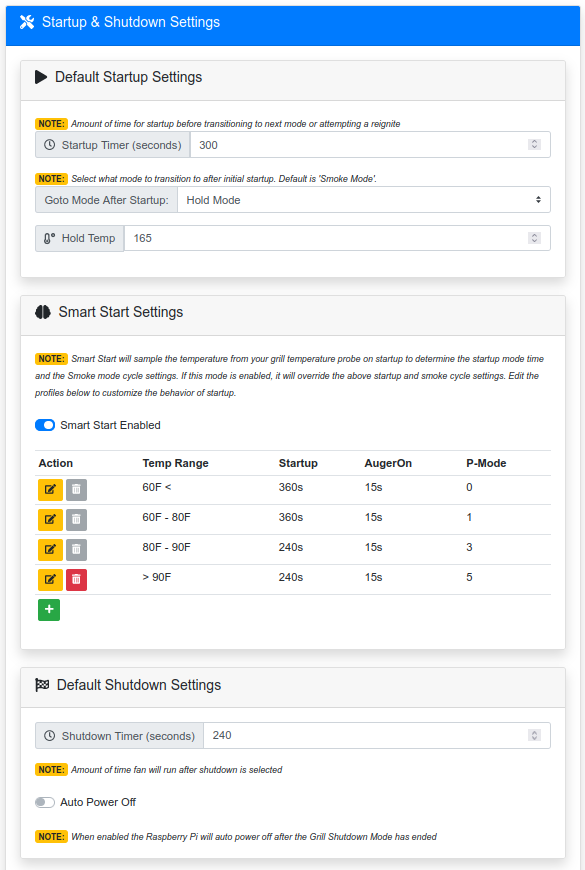
Startup & Shutdown Settings - You'll find all of the settings for startup and shutdown here.
- Default Startup Settings: You can configure the amount of time to spend in the startup cycle. This can vary based on equipment but may be shorter for higher performance igniters, or if the ambient temperature is higher. If you want your grill to go directly into Hold mode instead of Smoke mode, you can also select this here along with the set temperature.
- Smart Start: This feature, if enabled, will dynamically vary the startup time and the P-mode, depending on the ambient temperature (sampled at the beginning of startup). For example, if it is very cold outside, you may want a longer startup cycle to ensure that the fire has started initially and a lower P-mode. However, if the ambient temperature is very warm, it may only need a short cycle and a higher P-Mode. This makes it simple, so you don't need to change the P-Mode through different seasons of the year. - Shutdown: This card allows you to configure the number of seconds to spend in shutdown mode. This mode will burn down any pellets or dust that may be left in the fire pot at the end of a cook. This can help prevent situations where your firepot burns too hot when you start up, due to there being too much fuel left unburned in the firepot. Auto Power Off can be selected if you wish to power-down PiFire after the shutdown cycle has finished.
Dashboard - This section allows you to select from available dashboard themes if available.

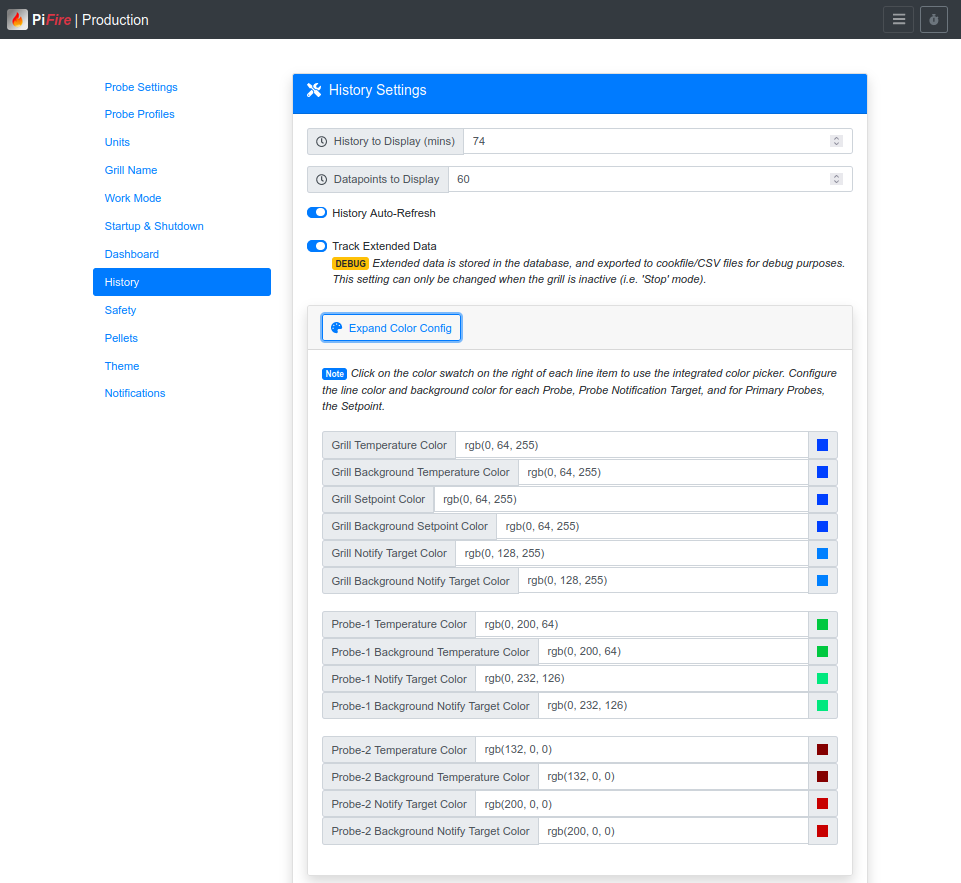
History Settings - Miscellaneous settings for the history page. You can define the number of minutes to display on the chart, so that you can effectively zoom in or out on the data. You can also define how many datapoints to display on the chart, which can help improve performance when doing auto-refresh. Basically, PiFire will divide the number of datapoints across the window of time that you have selected. Auto-refresh is enabled by default which will make the chart stream continuously, giving you a live view of temperature.
Track Extended Data is an option used for debug purposes to store more data from the current cook into the database and subsequently into the cookfile. This data can be found in the CSV exported from the cookfile or from the history page while the cook is active.
Since v1.5.0 you can now customize the chart colors for each of the probes. Clicking on the color box will bring up a color picker, or you can manually enter an RGB color value.
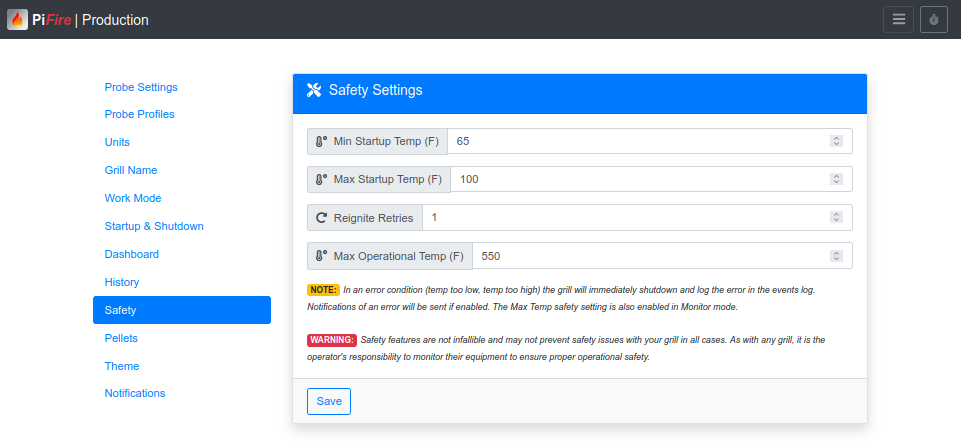
Safety Settings - As mentioned in the Note on Safety features section above, this allows you to define the temperature settings to activate those features.
- Preventing Firepot Overload - PiFire will sample the grill temperature at the beginning and end of startup to set a safe minimum temperature to operate. If the grill temperature drops below this temperature, it will stop the grill and send a notification of an error to prevent firepot overload.
- Min Startup Temp - If after the startup cycle has completed, the temperature has not exceeded this temperature, the grill will go into stop mode, or attempt to reignite if reignite retries has been selected.
- Max Startup Temp - If after the startup cycle has completed, the temperature of the grill exceeds this temperature, it will set the minimum safe temperature to this value. This is to prevent the grill from shutting down pre-maturely if the startup temperature was high.
- Reignite Retries - If the grill temperature drops below the startup temperature, attempt reignite. This number can be set to up to 10 total retries before failing.
- Preventing Grill Overtemp - PiFire will monitor the grill temperature during Smoke, Hold and Monitor modes to ensure that the grill does not exceed the Max Operational Temp setting defined here.
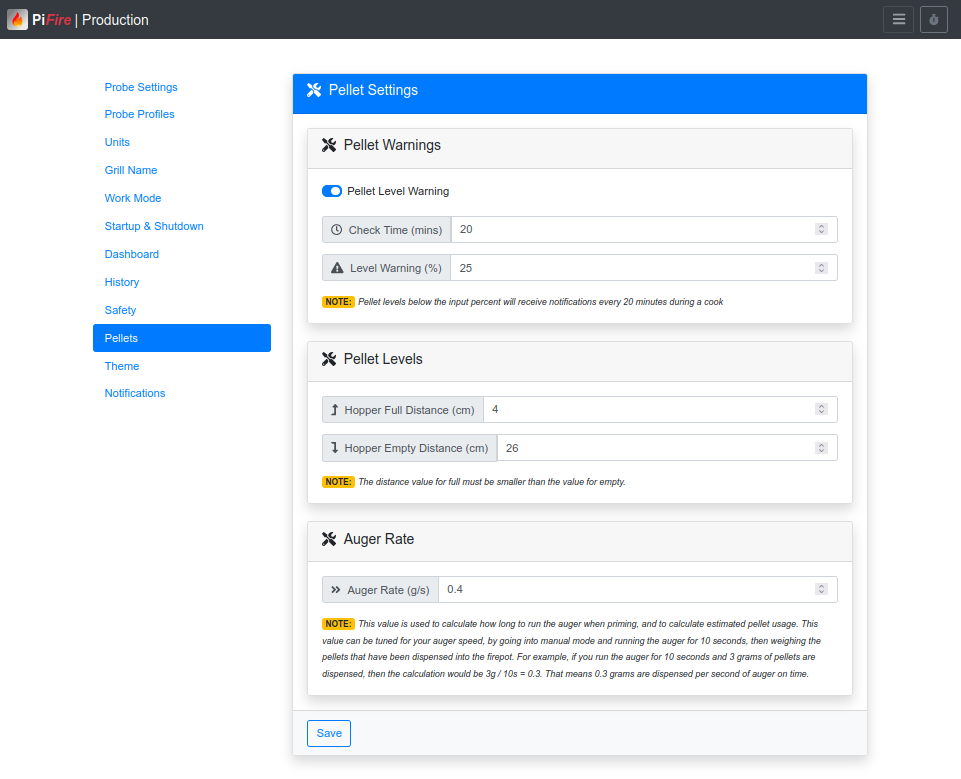
Pellet Settings - If you have a pellet sensor installed, you can configure settings for your particular sensor here. You can select if you want to be notified of the pellet level dropping below a certain percentage. You can also tune the distance sensor values for what the sensor will read when the hopper is full and when it is empty. Defaults are 4cm for full and 22cm for empty. Your hopper may vary, so you may want to change these to match your configuration. The Auger Rate is used to calculate estimated pellet usage and may need to be changed for your particular grill. Different augers run at different speeds and may dispense more or less grams of pellets per second.
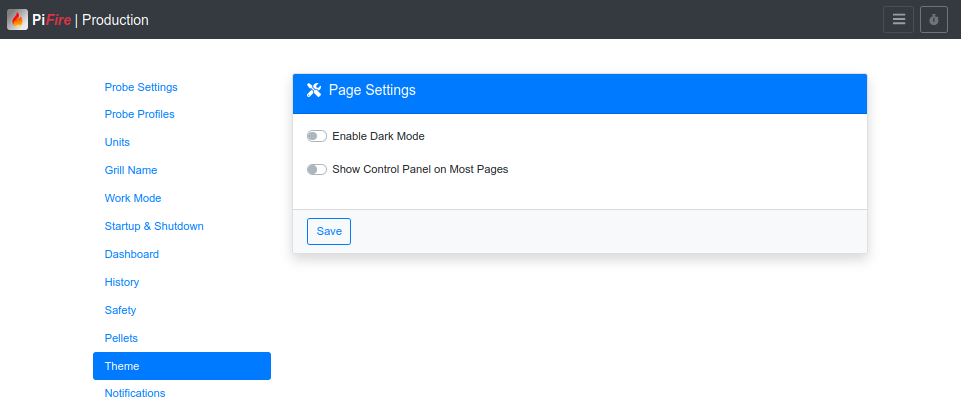
Theme / Page Settings - Currently allows the user to enable a dark theme for night-time viewing or if just preferred. In addition, you can configure the WebUI to have the control panel on most pages. I find this useful so that I don't have to go back to the dashboard to change the hold temperature or shutdown the grill.
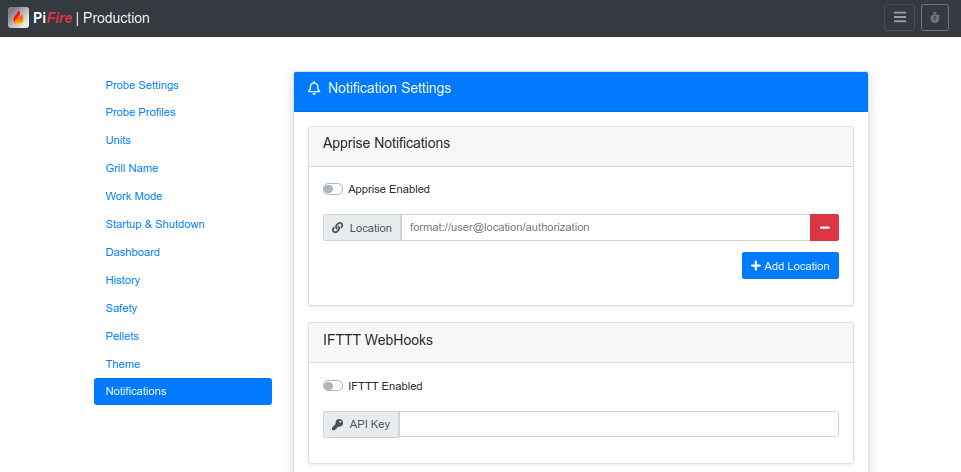
Notification Settings - If you don't want to enable notifications, ensure that all the fields with this section are left blank. If you want to utilize notifications, you can fill in the information for the notification services that are available. At this time Apprise, IFTTT, Push Bullet and Pushover notifications are supported. If you currently use one of these services you can setup your appropriate keys and settings to enable them.
IFTTT requires more configuration on the IFTTT website and is not in the scope of this documentation. However, the following are valid events:
- Grill_Temp_Achieved
- Probe1_Temp_Achieved
- Probe1_Temp_Achieved
- Timer_Expired
- Grill_Error_00
- Grill_Error_01
- Grill_Error_02
- Grill_Warning
The Android Application can also use push notifications, which can be configured here.
InfluxDB support is included for those who want to dump all of the data into an InfluxDB instance. This isn't thoroughly tested, so your mileage may vary.
History
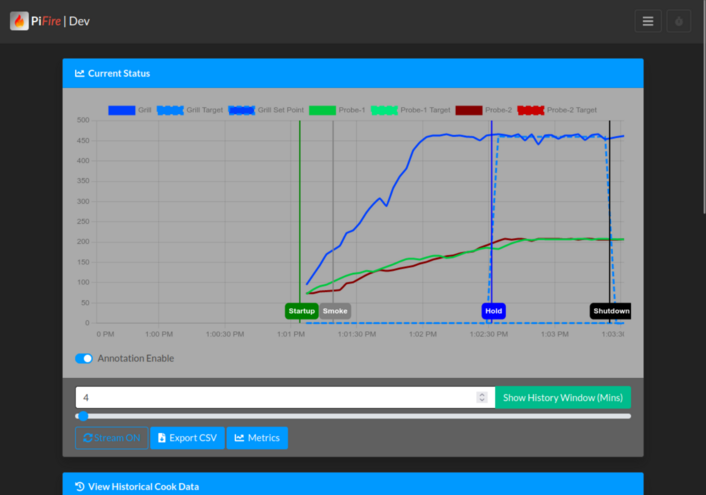
The history page provides a simple line-graph plot of the current status & history.
You will find most controls at the bottom of the history chart.
First is the Annotation Enable slider, which can turn off the chart annotations (i.e. Startup, Shutdown, Smoke, Hold annotations). Second is the Stream / Auto-Refresh button to enable/disable ‘live' data.
Third is a button for exporting the chart data to a CSV file. This is useful for those who might want to look at the data in Excel, or other spreadsheet software.
The chart itself can be interacted with by hovering (or clicking on) the data points. Some of the lines/data in the legend will likely have a stikethrough, meaning it is not currently displayed. You can click those legend items to make them visible on the chart. Conversely, if you want to make a data-set invisible, simply click the legend item.
At the bottom of this card is an input box to select the number of minutes you want to see, up to the current time (or time that the data collecting stopped). This allows you to "zoom-in" to just the last minute or "zoom-out" to view a longer window of time.
At the bottom of the page is a listing of all of the cookfiles. These are saved cook data from previous cooks. You can edit these files by clicking the edit icon next to each and then modifying the labels, names, adding photos, etc.
Pellet Manager
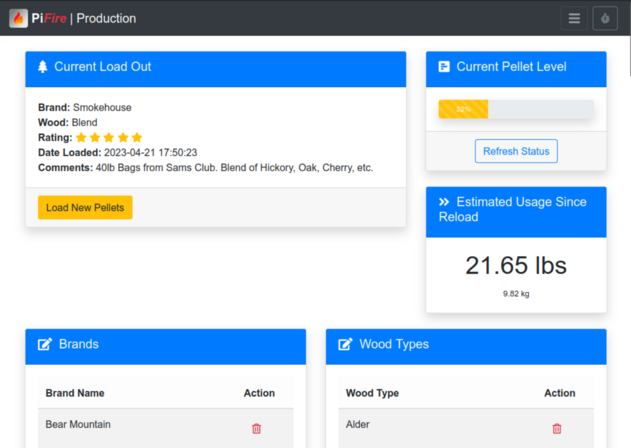
PiFire also allows you to track what kind of pellets you have loaded, when, and if supported hardware is present what the current hopper level is. Note that if the hardware to check pellet levels is not installed, the pellet level will always be 100%.
Current Load Out - This card provides basic information about the current pellets that are loaded in the hopper. (Brand, Wood Type, Rating, Date/Time Loaded and Comments about the particular profile). There is also a button to load new pellets (this allows you to select from the current list of pellet profiles).
Current Pellet Level - Provides a basic pellet level readout from the hopper if the hardware for measuring distance / hopper levels has been installed. This will be updated every one minute on this page.
Estimated Usage Since Reload - Provides an estimated amount of pellets that have been used based on the auger rate (set in settings) and amount of auger-ON time since the last reload of pellets.
Brands - Here you can add/delete different pellet brands to choose from for your profiles.
Wood Types - Here you can add/delete different wood pellet types to choose from for your profiles.
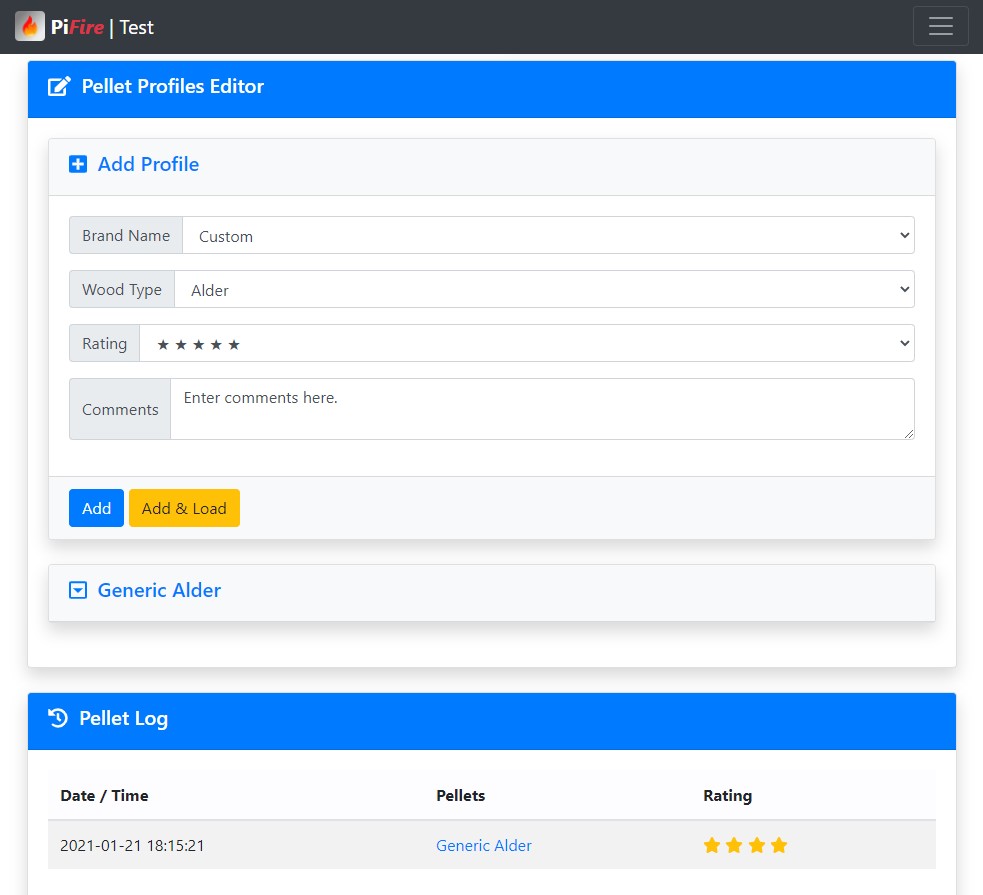
Pellet Profiles Editor - Here you can either ADD a profile of pellets (using brands and wood types from above), or edit/delete existing profiles.
Pellet Log - Basic pellet loadout log, to indicate when a particular pellet profile was loaded in the past. Allows the user to keep track of all the pellets that they have used and when.
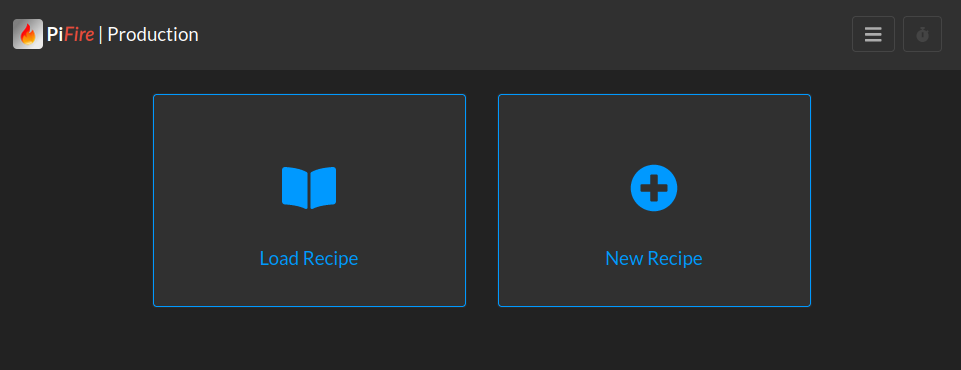
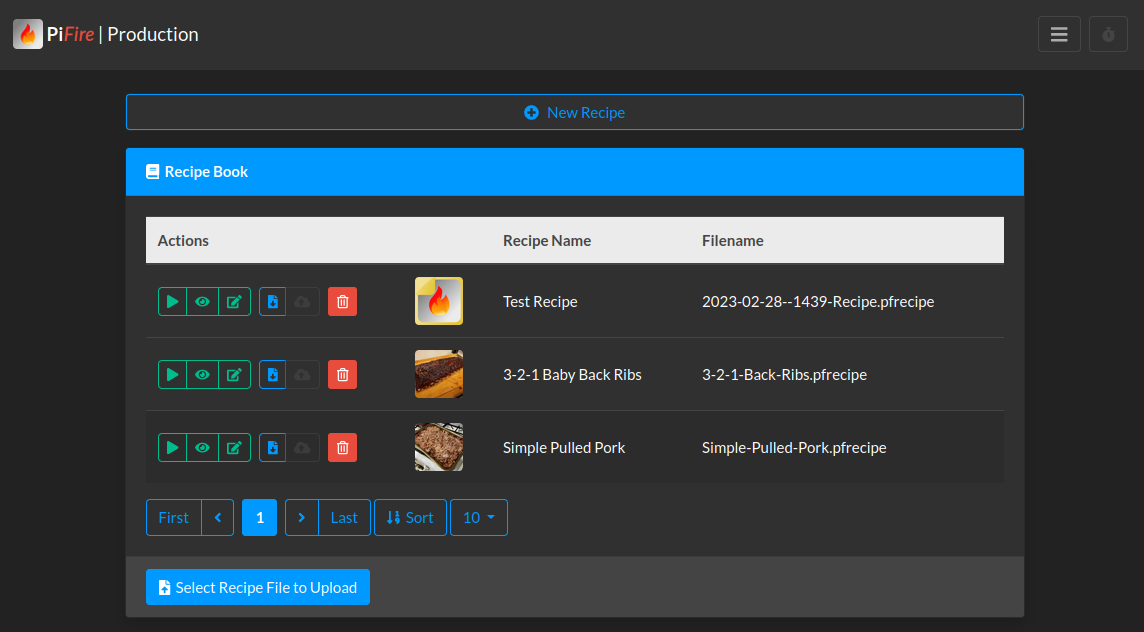
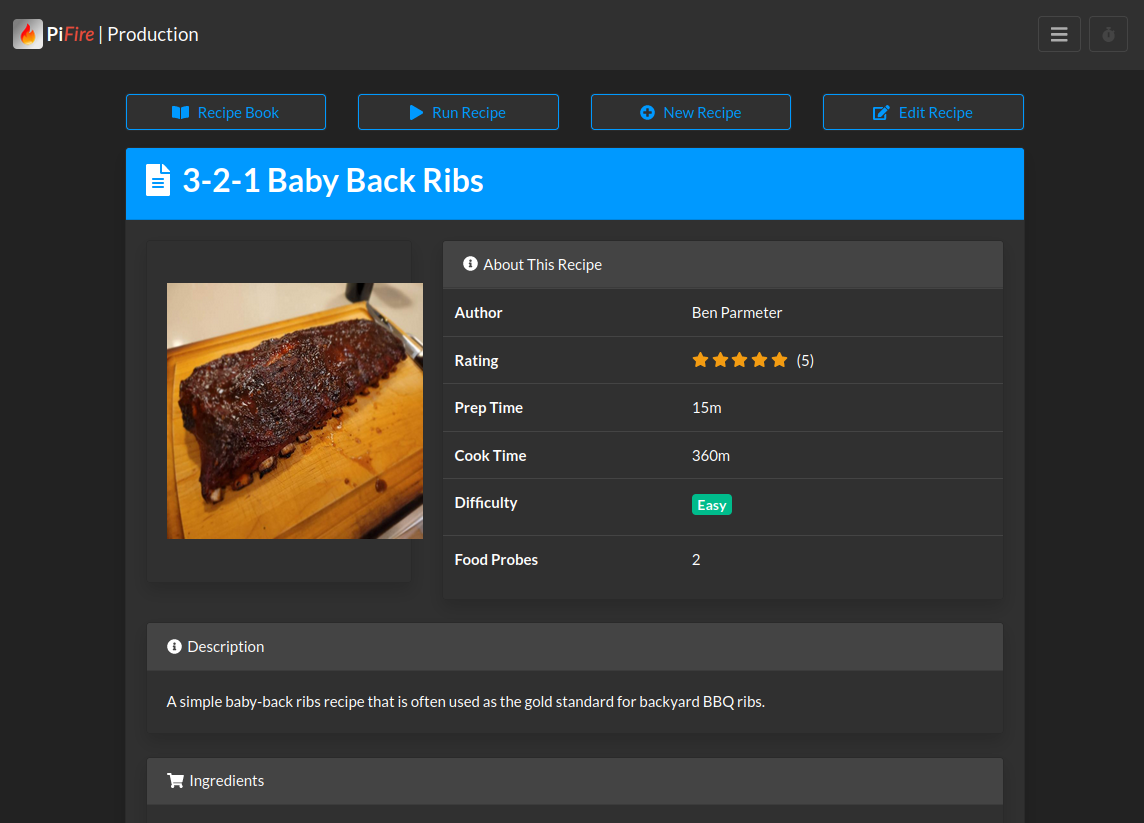
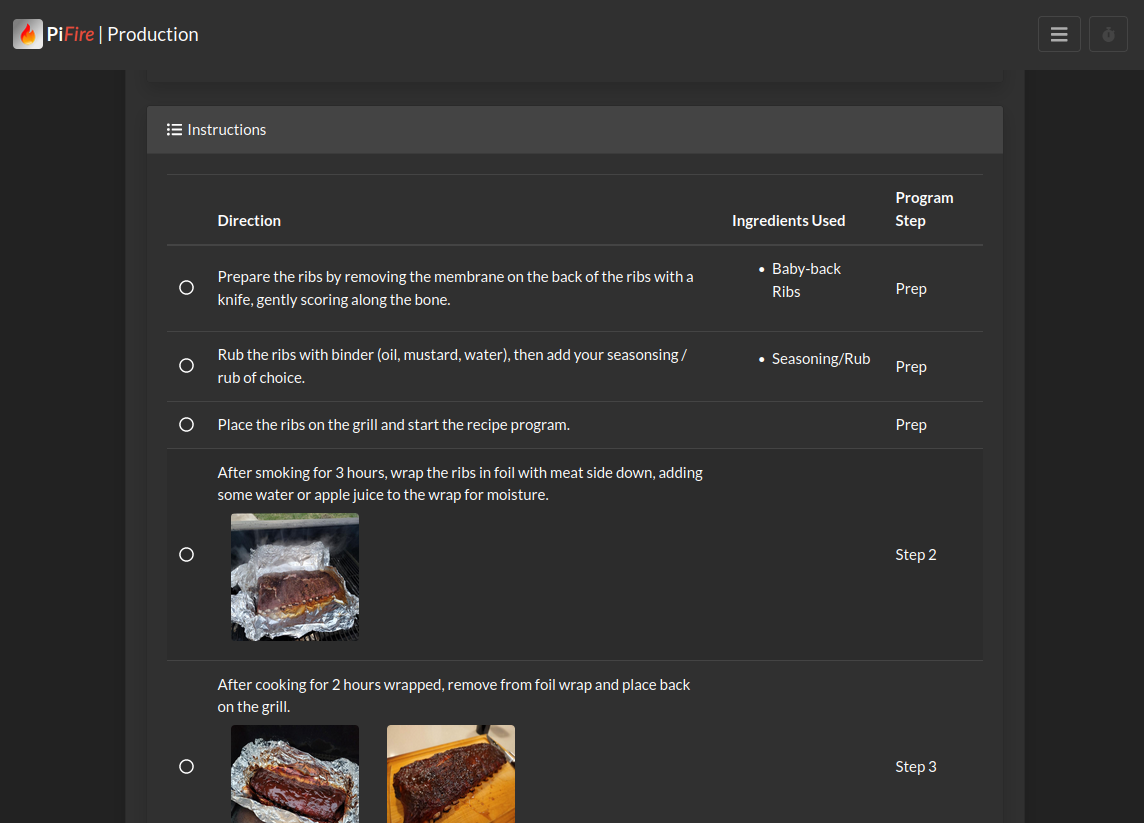
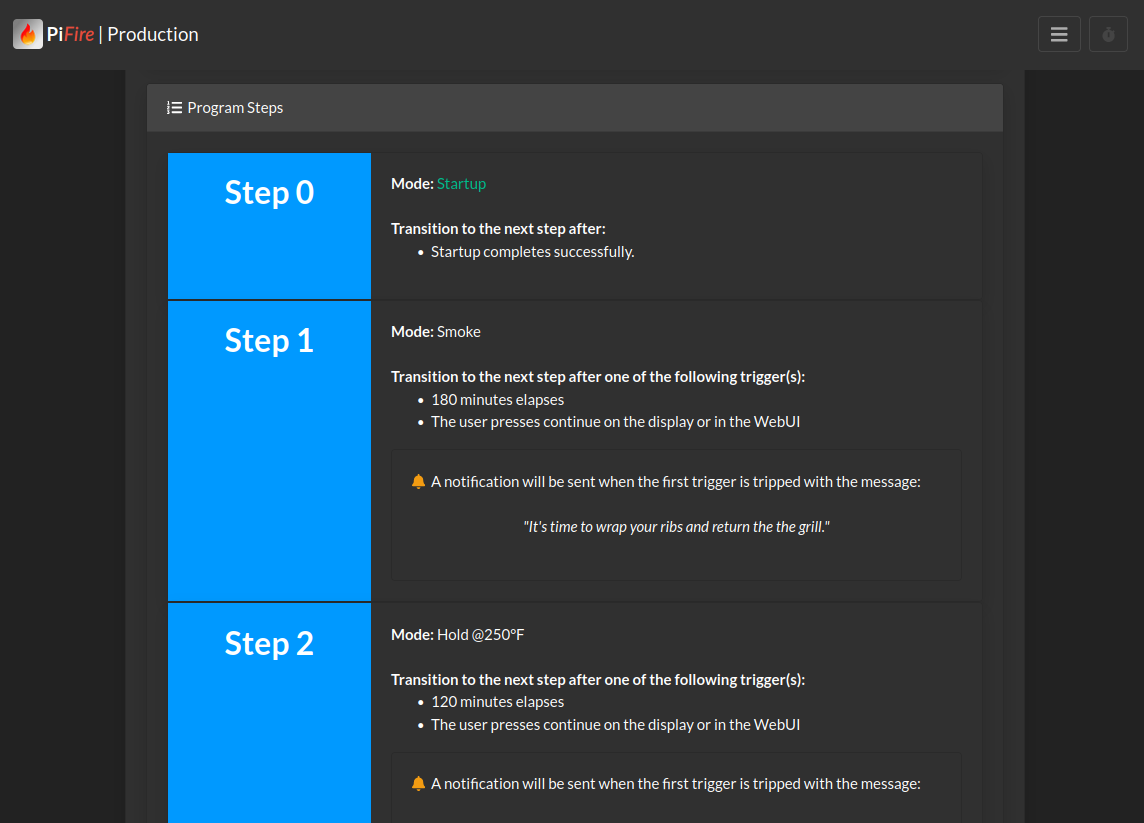
Recipe Mode (NEW)
This section is TBD. For now, enjoy these pictures.
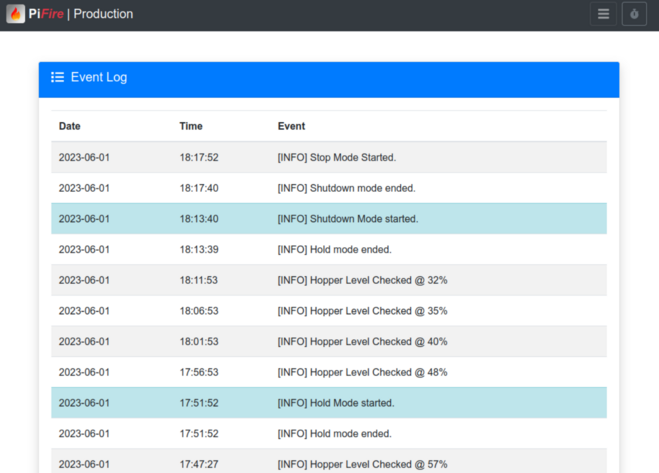
Events
This page provides limited history of the events since the system was turned on. This event history will be cleared on a reboot or, may be erased in the Admin Settings screen.
If debug mode is enabled, debug information will be included in the event history. Debug information will generally be more verbose than the event history. It's advisable to only turn on debug mode (in Admin Settings) if you are experiencing problems as this can affect performance of the system.
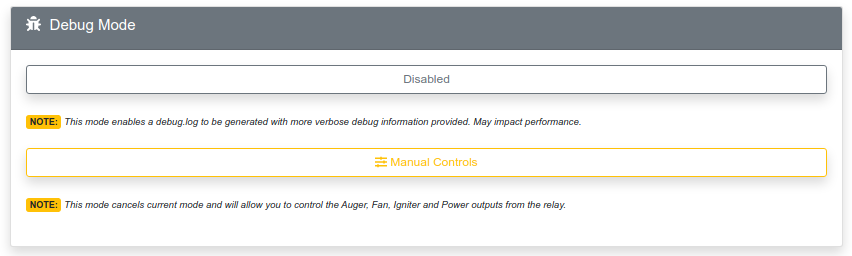
Admin Settings
In the admin settings page, you can set global settings that will configure the system. These include turning on debug mode, enabling manual mode.
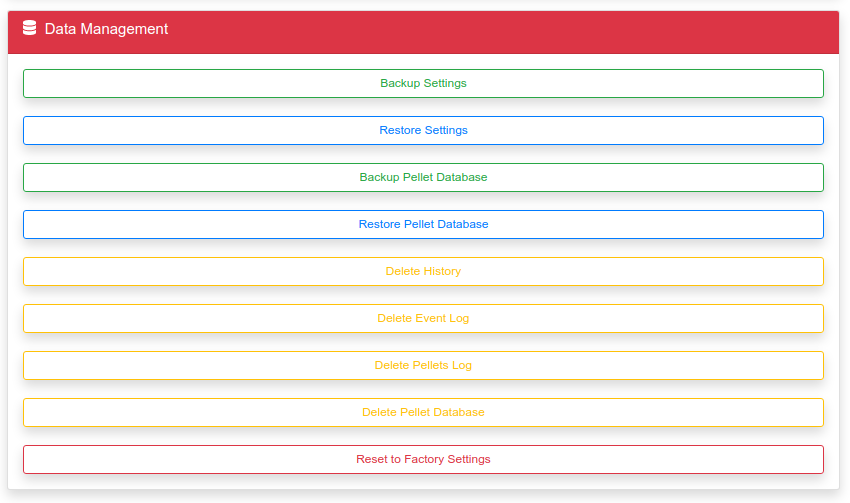
The Data Management card allows you to manage your PiFire data. Here you can backup and restore your settings (including probes/probe profiles) and Pellet Database (including the logs). You can also choose to delete data for history, events, pellets. You can reset all settings, logs and databases by selecting Reset to Factory Settings.
Resetting to factory settings will remove any settings you had for modules and may return the system to defaults. You may have to follow instructions on the installation page to configure your modules again.
Scrolling down further gives you the option to reboot the system or shutdown the system.

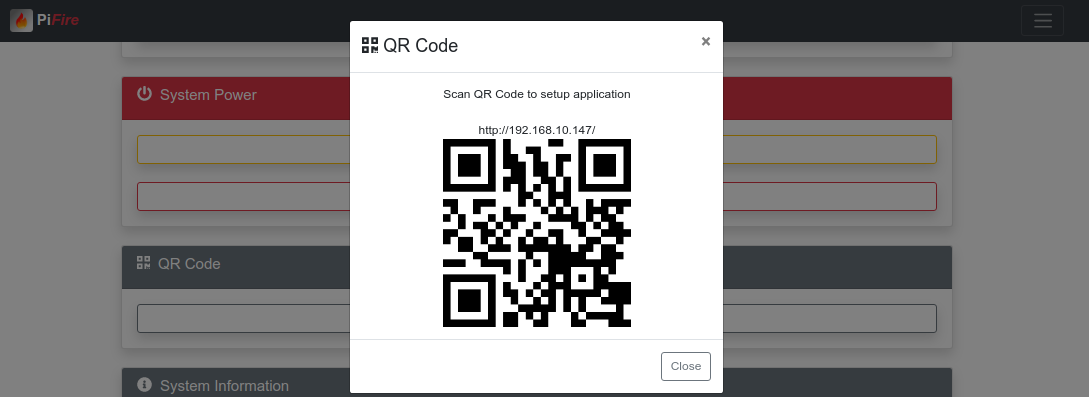
Newly added is a QR code feature to display the QR code for the IP address of PiFire. You can use this to share with others in your household, or configure the Android application.
Below these controls, you'll see more information about the system hardware, system temperature, uptime, GPIO Pins, etc.
Physical Interface (Display w/Buttons)
For PiFire installations that have a physical screen and buttons, you can control the grill directly from this interface. The examples show below are for the ILI9341, so if you are using the SSD1306 OLED display it will appear slightly different (and in monochrome) but the concepts are the same.
From PiFire Off Mode
Start by pressing one of the buttons (Up, Down, or Enter). This will bring up the first menu item.

From here you can select Startup by pressing the Enter button. Or if you press Up or Down you can cycle through the other options (Monitor, Stop).
Startup Mode
After selecting Startup, you should see the main dashboard:
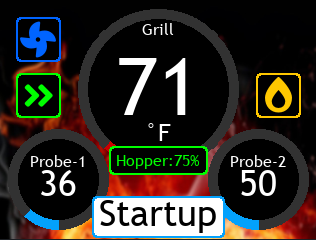
The icons represent the currently activated functions. In startup, the upper left will display the fan active icon, the left icon with green arrows indicates the auger is active, and the yellow flame icon indicates the igniter is active.
The bottom of the screen will indicate the current mode that PiFire is active in. The Hopper Level in the center will indicate the level of pellets in the hopper (if equipped).
The Grill temperature is front and center, and the probe temps are to the lower left and right are indicated with both the temperature and circular indicator.
Active Modes (Startup, Reignite, Smoke, Hold, Shutdown)
When in active mode, pressing any of the buttons should bring up the menu starting with the shutdown option.
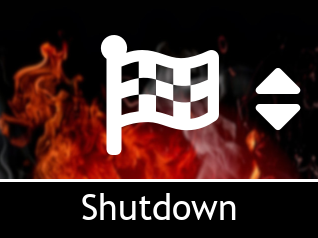
Pressing Enter will select the option. Or pressing Up or Down will cycle through the other options: Smoke+, Hold, or Stop.

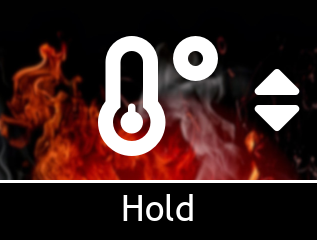
If you select Hold, you can then select a temperature by pressing Up or Down, then pressing Enter:
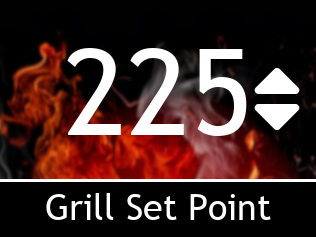
If you do not press Enter after selecting a temperature, the set point will not be selected.
This should set Hold Mode at the selected temperature:
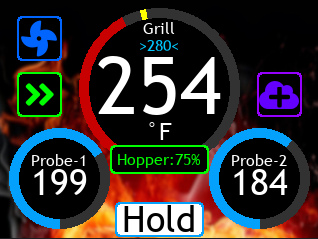
Note that the icon on the right (purple) indicates Smoke Plus is enabled. Also note that the grill set point temperature is indicated inside the display circle for the grill.